How do I ask conditional questions in an audit template?
This article provides a video and written guide on adding conditional questions and sections in an audit template.
Firstly, you will need to login to your Notify account, you can do this here
Attention: Custom Visibility Rules cannot be applied in the below conditions:
- If a section is checked as 'Can be Not Applicable'.
- If a section and/or question already has a Custom Visibility Rule applied.
1. Select form templates

2. Choose the template you are adding conditional questions to

Alternatively, create a new template.
If you are editing an already published template, click Create New Version on the template to do this.
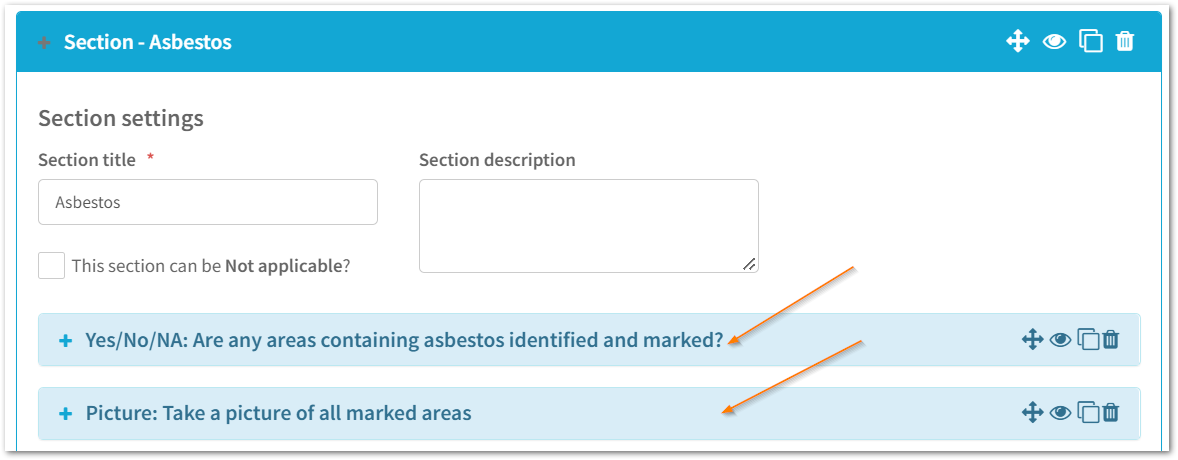
3. Create your questions

In this example, I only want the picture field to appear if the auditor answers Yes to any areas containing asbestos.
Tip: It is important to ensure you have written your questions before applying visibility rules.
If you change the question after applying the visibility rules, re-apply these.
Attention: Custom visibility rules can only be applied to questions relating to List Fields if the list doesn't allow multiple answers to be chosen.
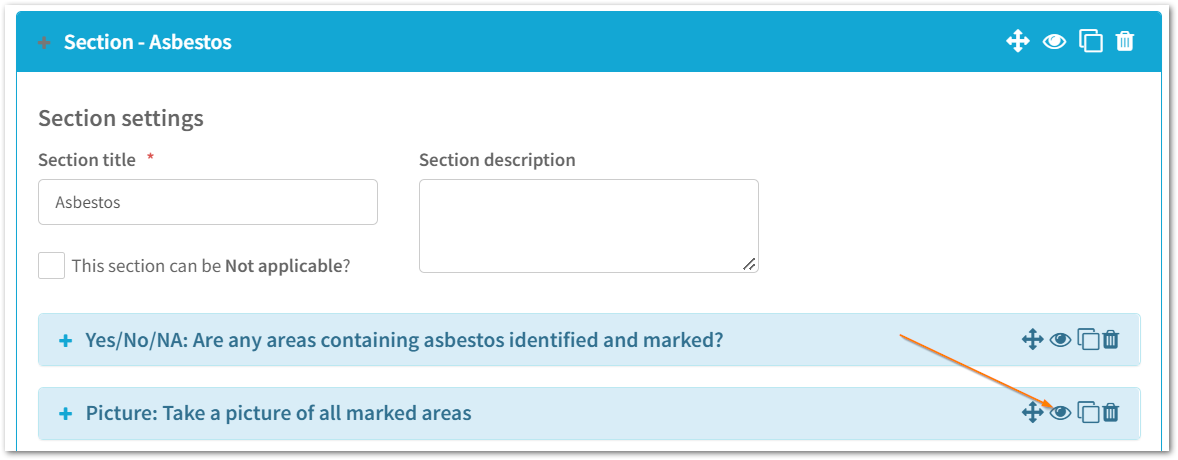
4. Click on the eye icon of the conditional field

5. Set your visibility rules

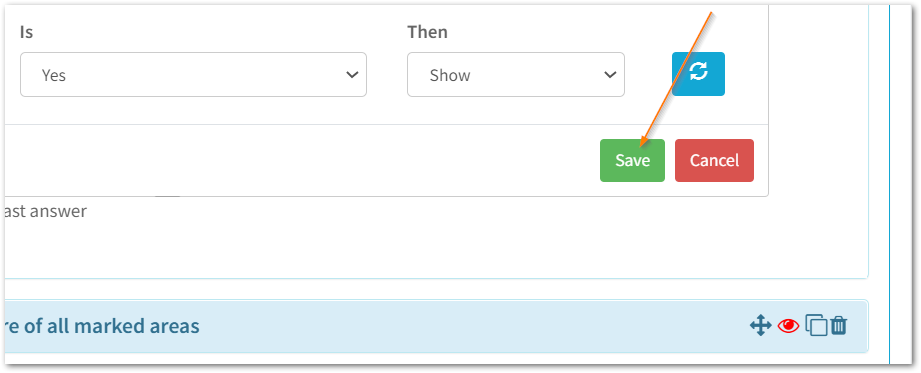
Once you click on the eye icon, the above pop-up will appear, this is where you set the visibility rules.
Here, you will need to choose the section of the question that the visibility rule relates to in the 'If' Section.
Then, choose the question the rule relates to under Question.
The answer that will trigger the custom visibility rule under Is.
Finally, decide what you want the custom visibility field to do (Hide, Show, Show & Mandate) under Then.
For this example, I have chosen the Asbestos section; if the auditor answers Yes to 'Are any areas containing asbestos identified and marked?' a picture field will then appear and prompt the auditor to take pictures of these.
Tip: Fields that you can show and mandate are the Action and Picture fields. If this is used, auditors won't be able to complete the audit without taking a picture and/or creating an action.
All other fields will allow you to Show / Hide when applying the custom visibility rules.
6. Click save

Once you are happy with your custom visibility rule, click save.
The eye icon will then turn red to show you that a visibility rule has been applied to the field.
7. Click preview

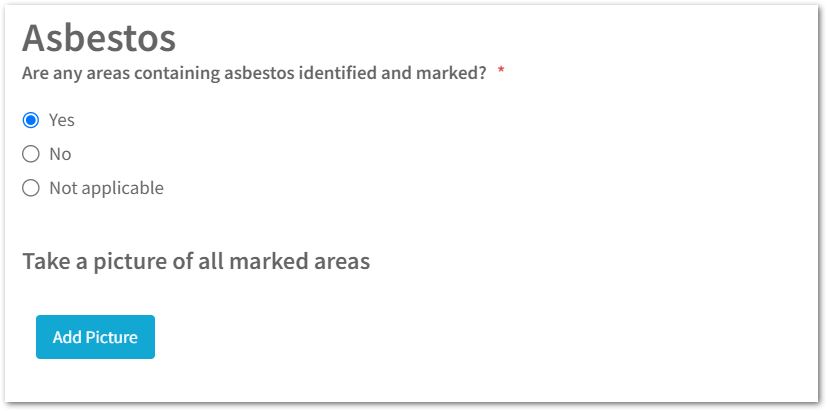
To see how this will appear when the audit is being conducted, click preview and answer the questions that trigger fields with visibility rules.

In the example above, the picture field has appeared as I selected Yes to the question above it.
8. Save your template
%20RingCentral%20-%20Message.png?width=688&height=126&name=2023-12-06%2016_02_29-(1)%20RingCentral%20-%20Message.png)
Finally, save your template as you make changes.
This will also ensure that auto-save is enabled on your template.
The auto-save functionality will then be triggered to save every 3 minutes after the last change you made.
%20RingCentral%20-%20Message.png?width=688&height=55&name=2023-12-06%2016_05_00-(1)%20RingCentral%20-%20Message.png)
Once you are ready to publish, click the publish button. 
![Notify_Refresh_MasterLogo_CMYK[1]](https://helpcentre.notifytechnology.com/hs-fs/hubfs/Notify_Refresh_MasterLogo_CMYK%5B1%5D.png?width=291&height=117&name=Notify_Refresh_MasterLogo_CMYK%5B1%5D.png)