![Notify_Refresh_MasterLogo_CMYK[1]](https://helpcentre.notifytechnology.com/hs-fs/hubfs/Notify_Refresh_MasterLogo_CMYK%5B1%5D.png?width=291&height=117&name=Notify_Refresh_MasterLogo_CMYK%5B1%5D.png)
Firstly, you will need to login to your Notify account, you can do this here
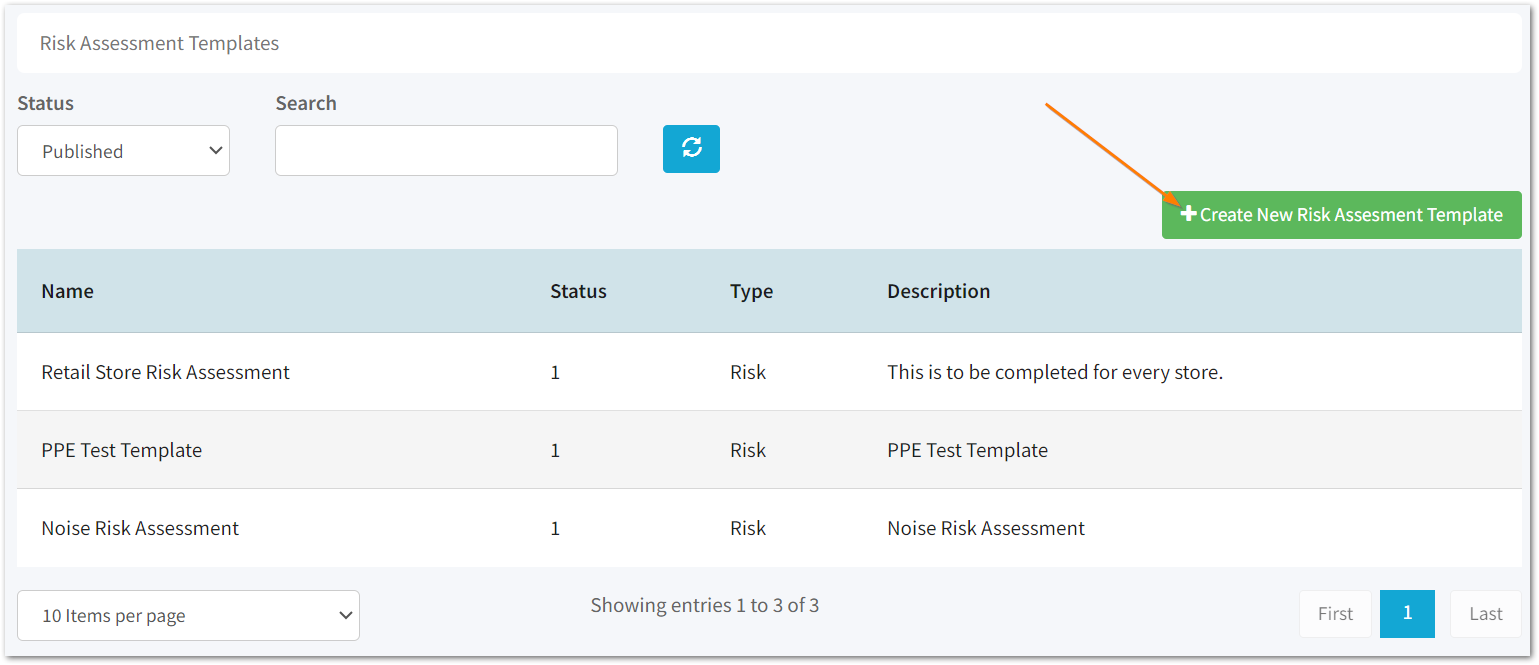
1. Select Risk Templates

2. Click on Create New Risk Assessment Template
3. Set your report preferences

Here, you will be able to choose where your company logo will appear on the PDF export; the theme colour for the export, as well as toggling on the option to include an Initial Risk Score.
4. Optionally switch on E-signatures

If you switch on E-signatures, you will be able to customise the Section title and text and whether the signature is geotagged and date/time stamped.
You can also choose whether signatures from an assignee and/or approver are required in order to complete the Risk Assessment.
5. Enter the Risk Assessment details
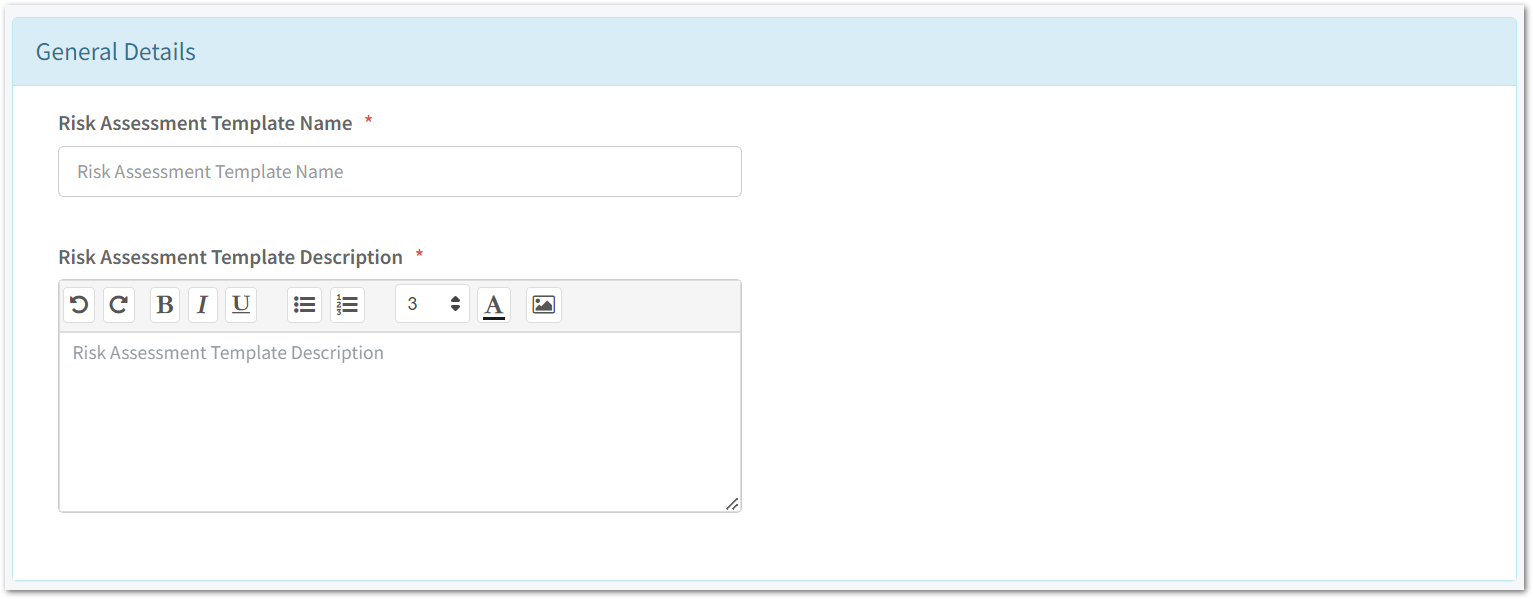
Here, you will need to name your Risk Assessment and provide a description.
6. Save your Template

To enable auto-save on your template, you will first need to save it.
The auto-save functionality will then be triggered to save every 3 minutes, after the last change made.
7. Optionally enter the Safe System of Work

8. Optionally enable COSHH/PPE settings
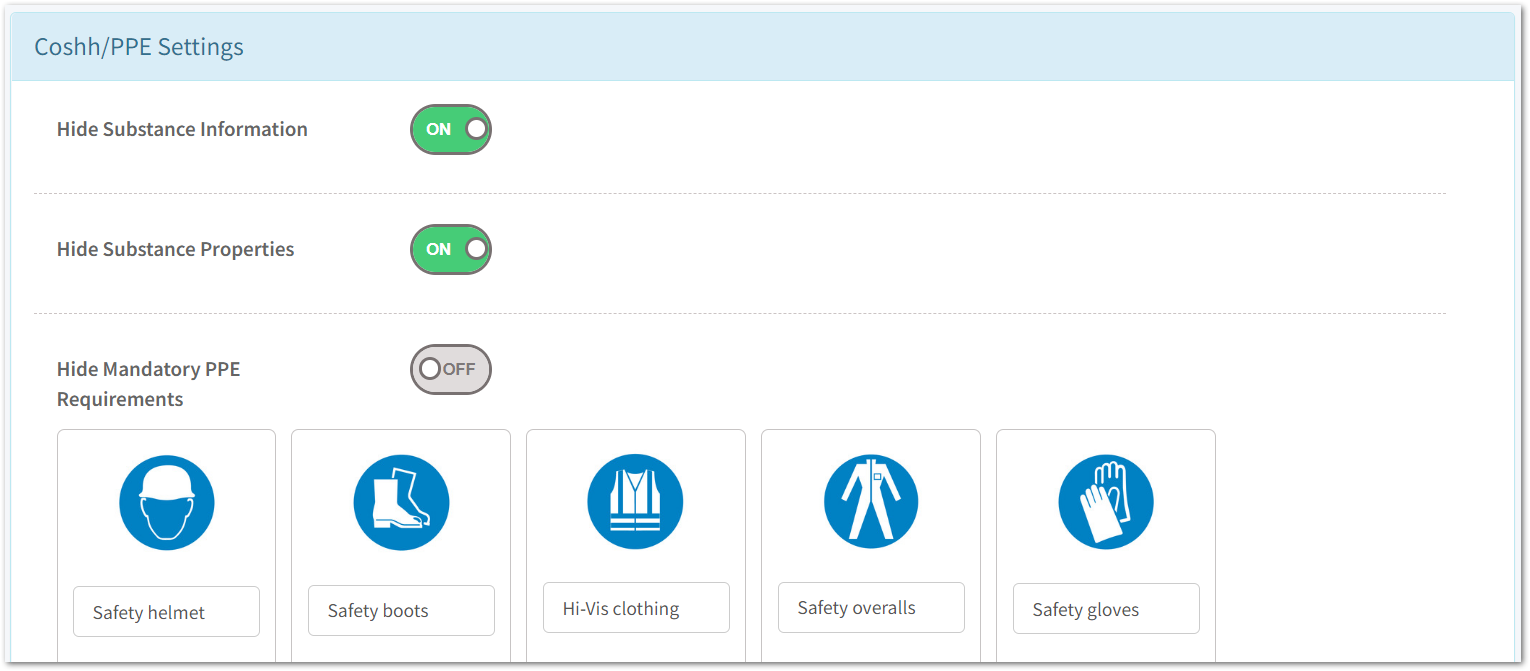
Here you can choose whether COSHH/PPE items are hidden in your form template.
If you choose not to hide these, you will be able to override the descriptions of the Substance properties, as well as the PPE items.
These will then appear on the published Risk Assessment and you will be able to select which items are relevant when carrying out the assessment.
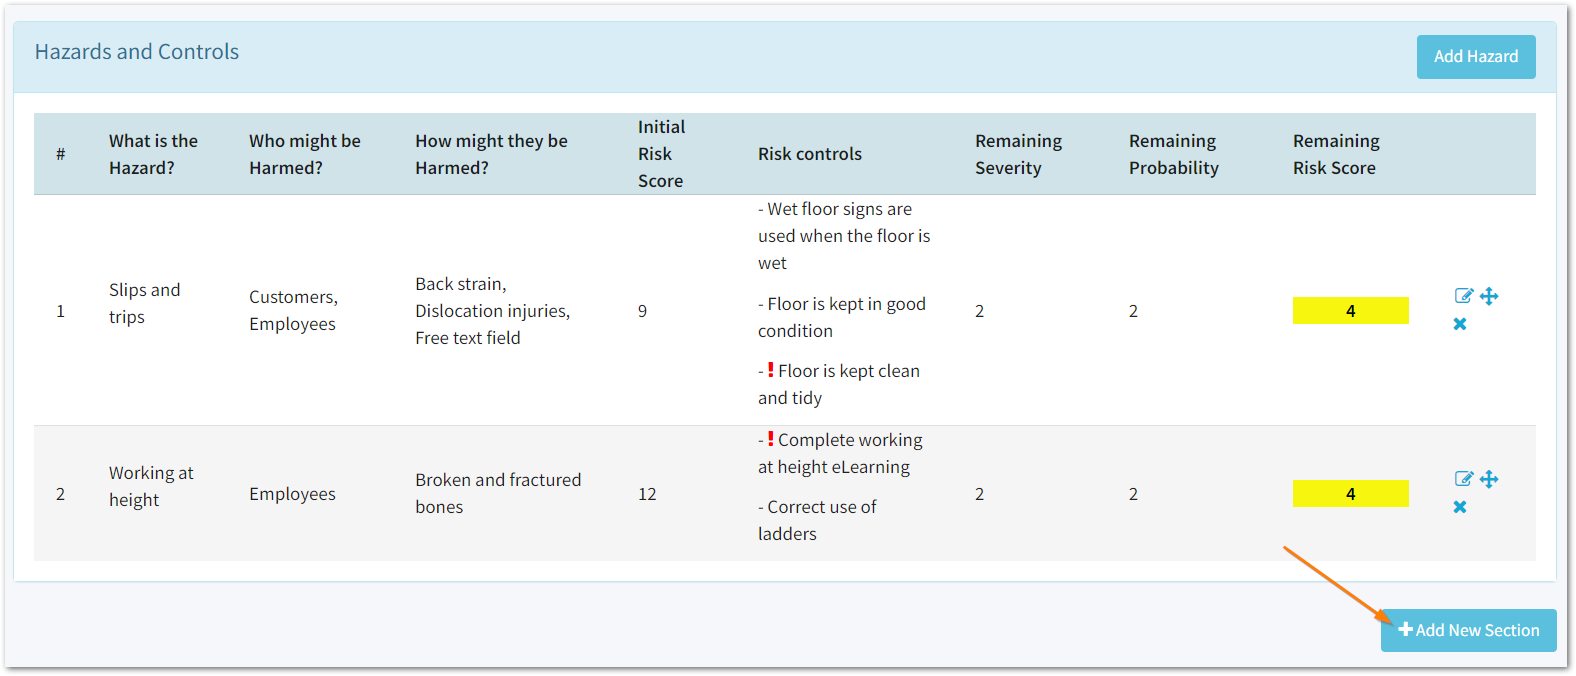
9. Create your hazards and controls
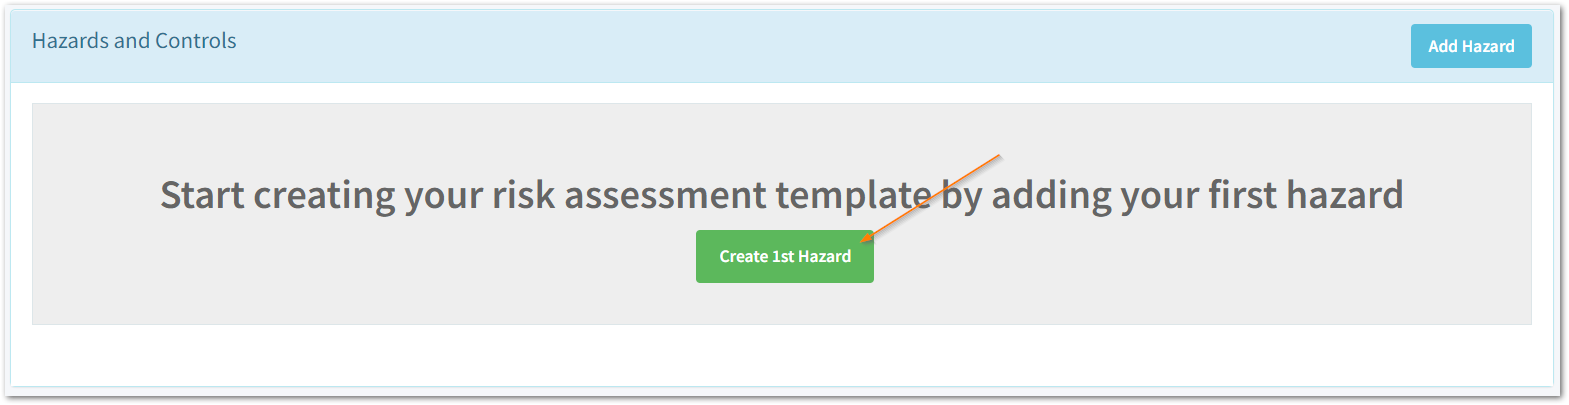
To create your first Hazard and Controls, Click on Create 1st Hazard.
For any additional hazards, click Add Hazard in the top right of the Hazards and Controls section.
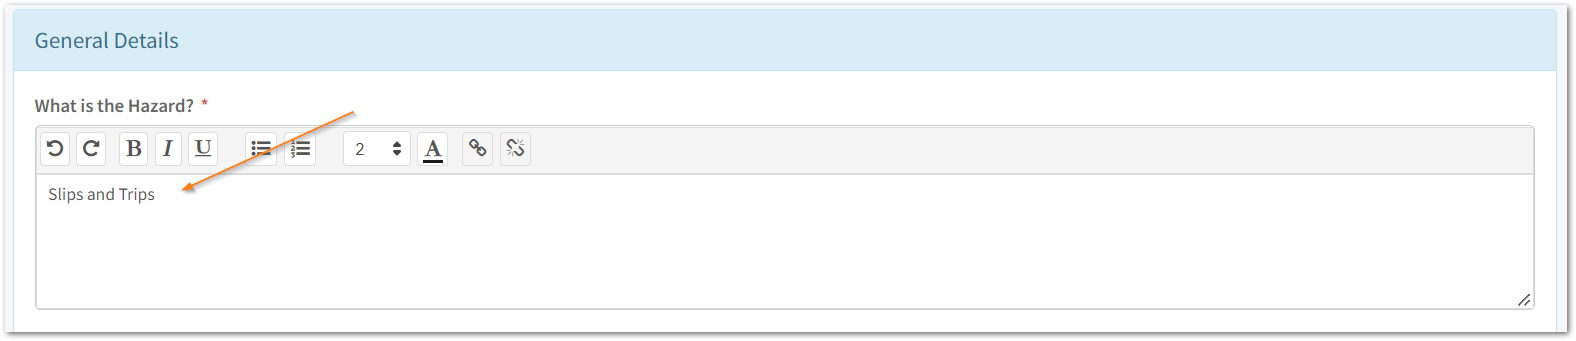
9.a Enter your hazard
9.b Choose who might be harmed and how

Here, you are able to select multiple options on the drop down. If the option you are searching for doesn't exist - select Other and provide a description in the text box that appears.
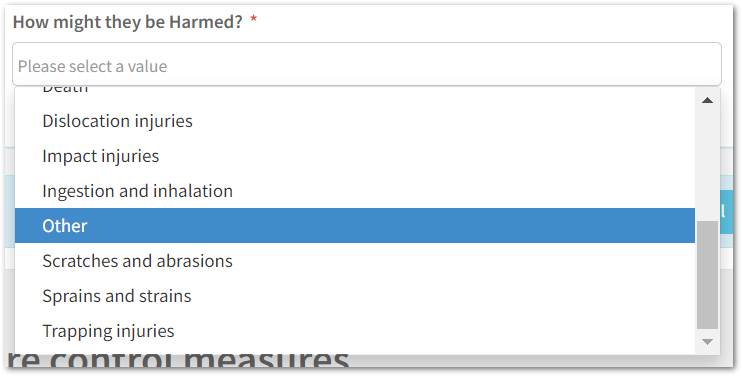
Then, select how they may be harmed. As above, you are able to select multiple options on this list and enter a description if 'other' is chosen.
9.c Enter your controls
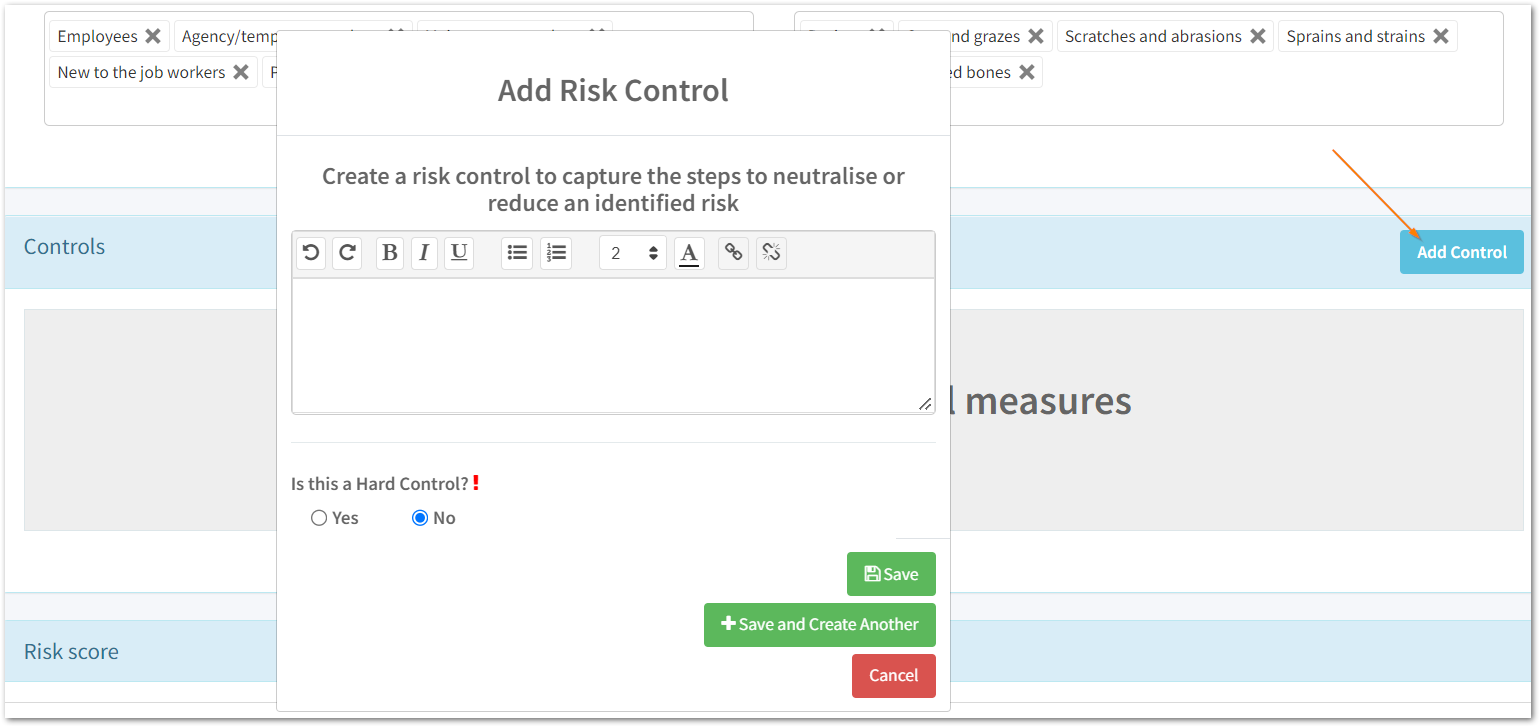
Here, Click Add Control and type this into the text box.
Once this has been added, select Save or, Save and Create Another if you have multiple controls for the Hazard.
9.d Select the risk score
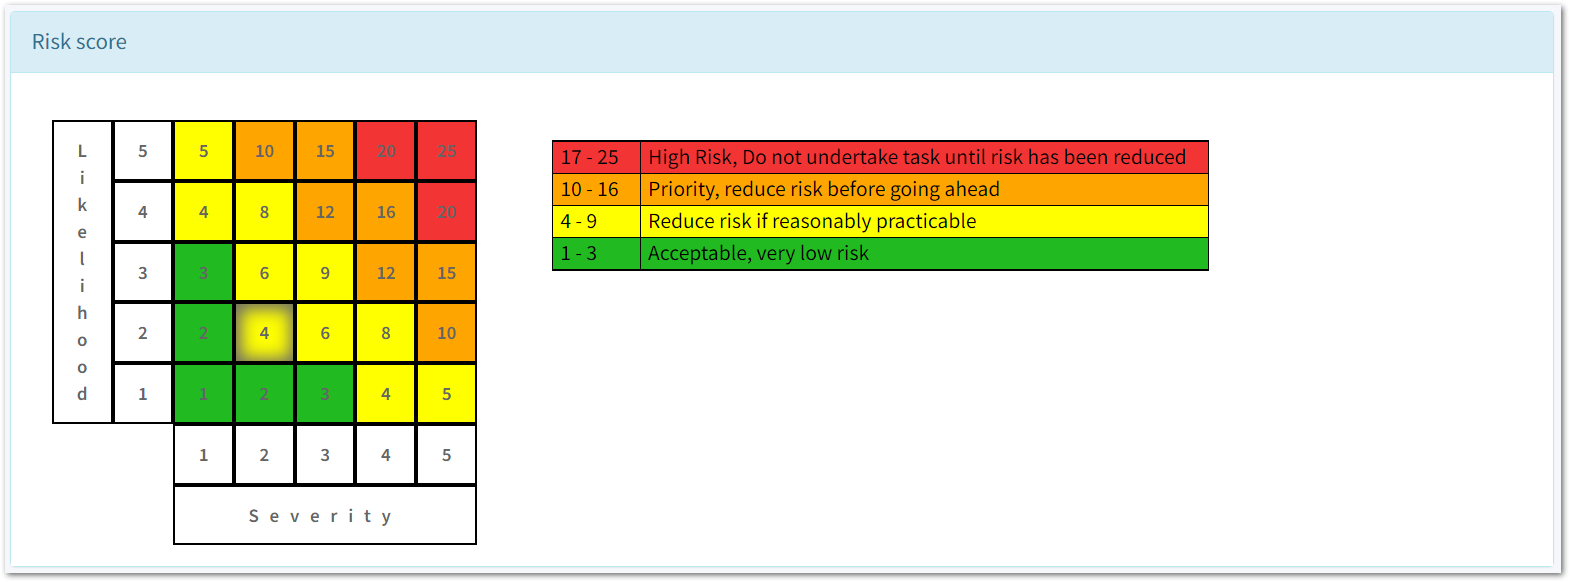
Click a number within the likelihood and severity matrix to select the risk score.
10. Save your Hazards and Controls

When clicking Save, you will be directed to the previous Risk Template page - to create another Hazard instead, select Save and Create Another.
11. Optionally edit, delete and/or rearrange your Hazards
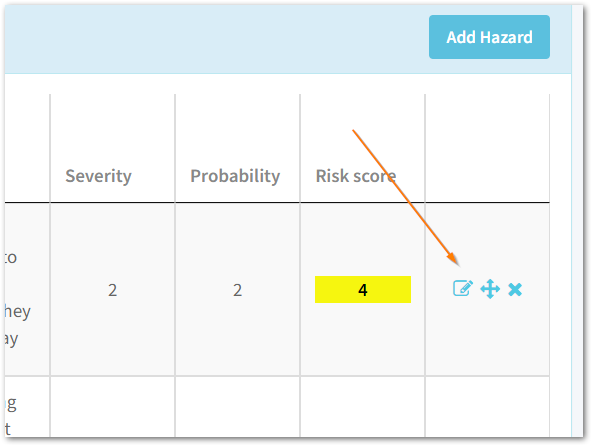
- To edit: click on the pen and paper icon
- To rearrange: click on the horizontal and vertical arrows and drag up/down
- To delete: click on the cross
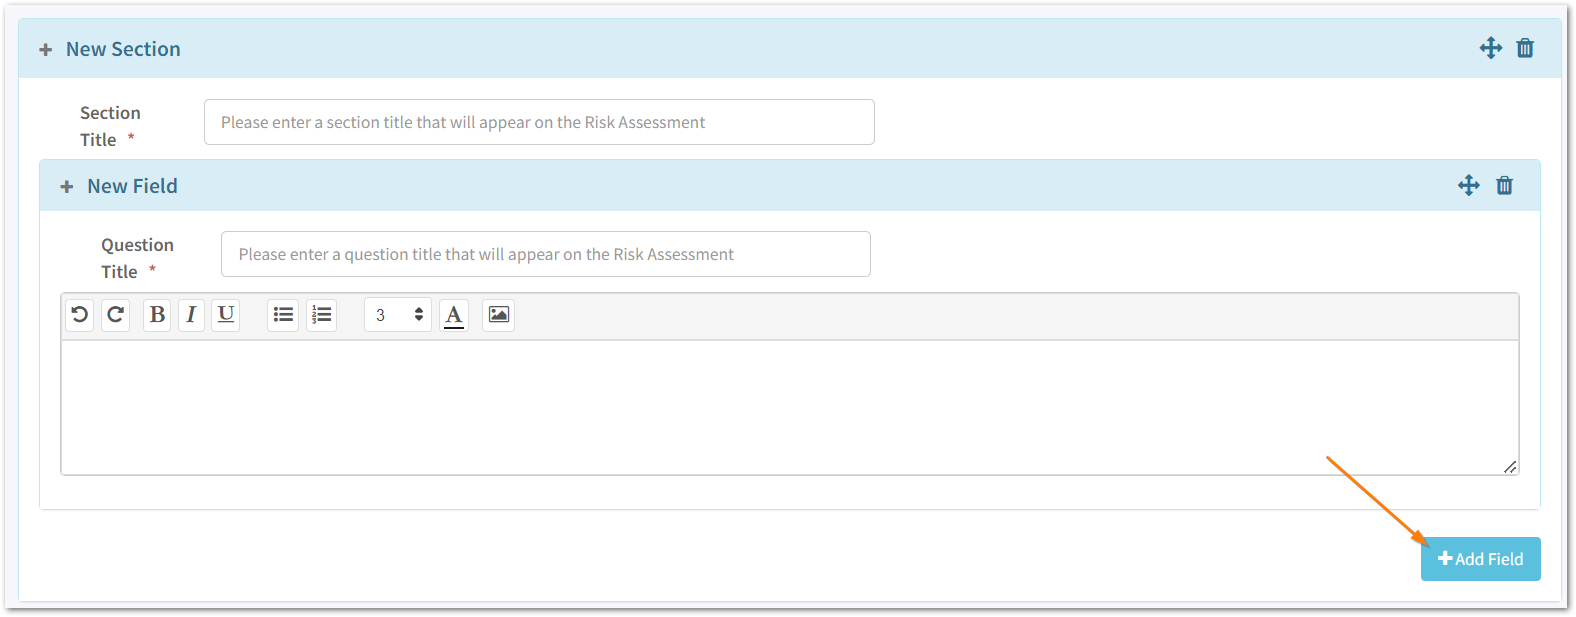
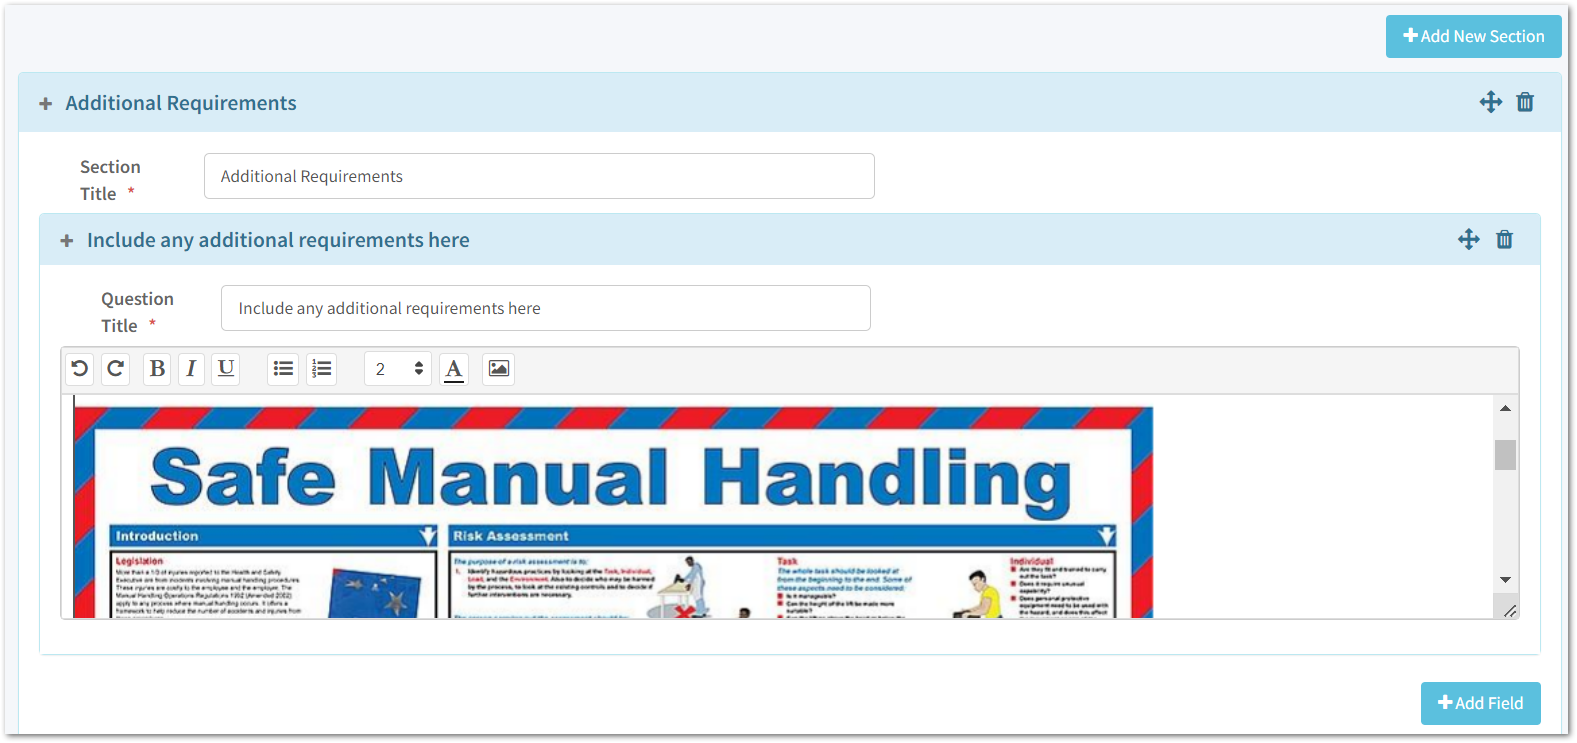
12. Optionally include additional sections
12.a Enter the New Section Title and Question Title
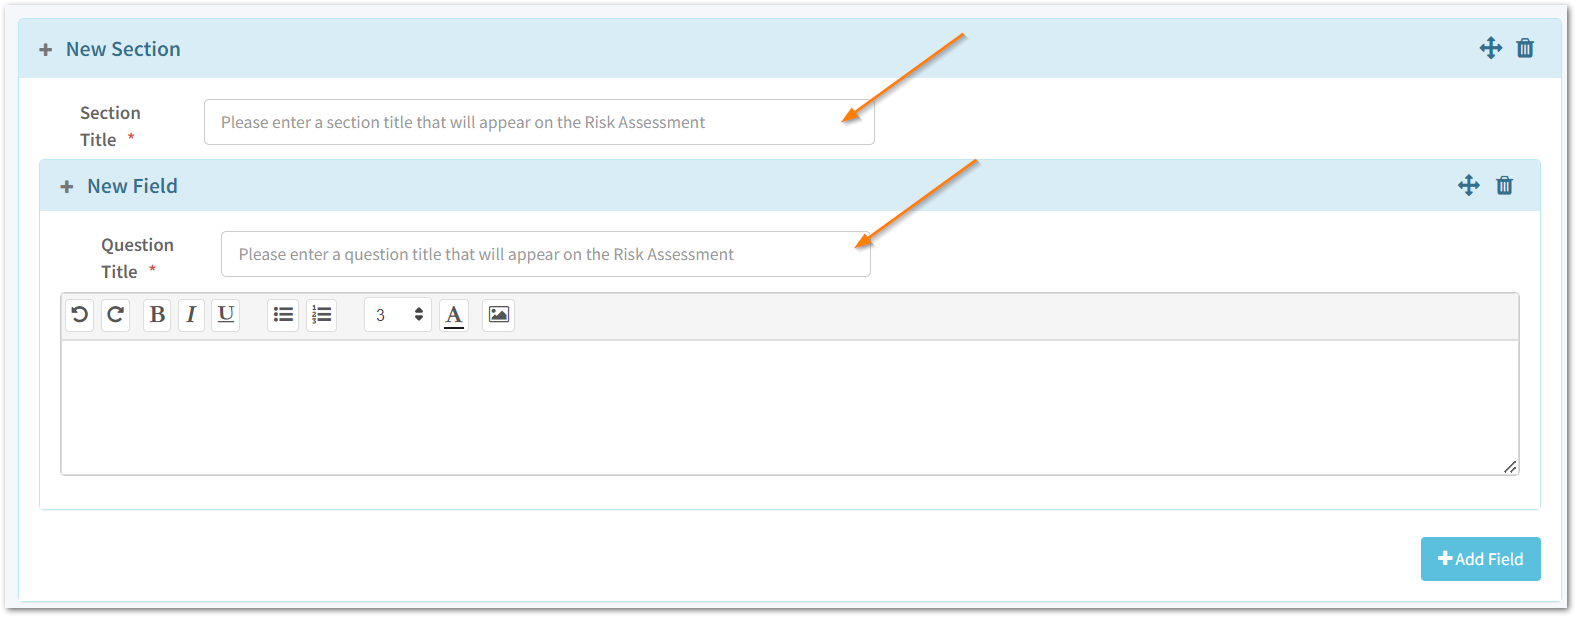
For any additional fields, select New Field
For any further additional sections, select Add New Section

12.b Optionally add pictures

After selecting the image icon, choose an image from your files.
13. Publish your Risk Assessment template.

14. Your Risk Assessment is published!

Once you have published your template you will then be able to carry this out in the Risk Assessment tab.
You are also able to edit and archive the template on this screen.
By clicking Cancel, you will return to the Risk Templates tab.