
Note: Your organisation may have customised some screens, so they may not appear the same. Don't worry though, the concept remains the same
If in doubt you should contact your System Administrator for further support
This article explains how to cancel an incident in Notify and how to restore a cancelled incident if needed.
To get started, log in to your Notify account. You can log in here.
1. Click on Incidents

2. Click on the incident you would like to cancel
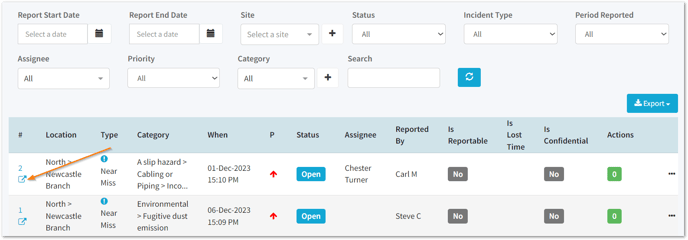
3. Select 'Cancel Incident'

4. Provide a reason for cancelling the incident

The details entered in this box will appear in the 'Activity' section within the incident.
Then select Save.
The incident will be cancelled and will appear as cancelled on the main Incidents tab.

Restoring a Cancelled Incident
To restore a cancelled incident, open the incident and select 'Restore Incident'.
