How do I create/edit a user?
This article provides a video and written guide on how to create and edit user profiles
Note: Only system administrators with the User Management permission will be able to access this area of the system.
Firstly, you will need to login to your Notify account, you can do this here
1. Click on the User Management tab

2. Click Create New User

If you are editing the account of an existing user, select their profile:
 Then, select edit

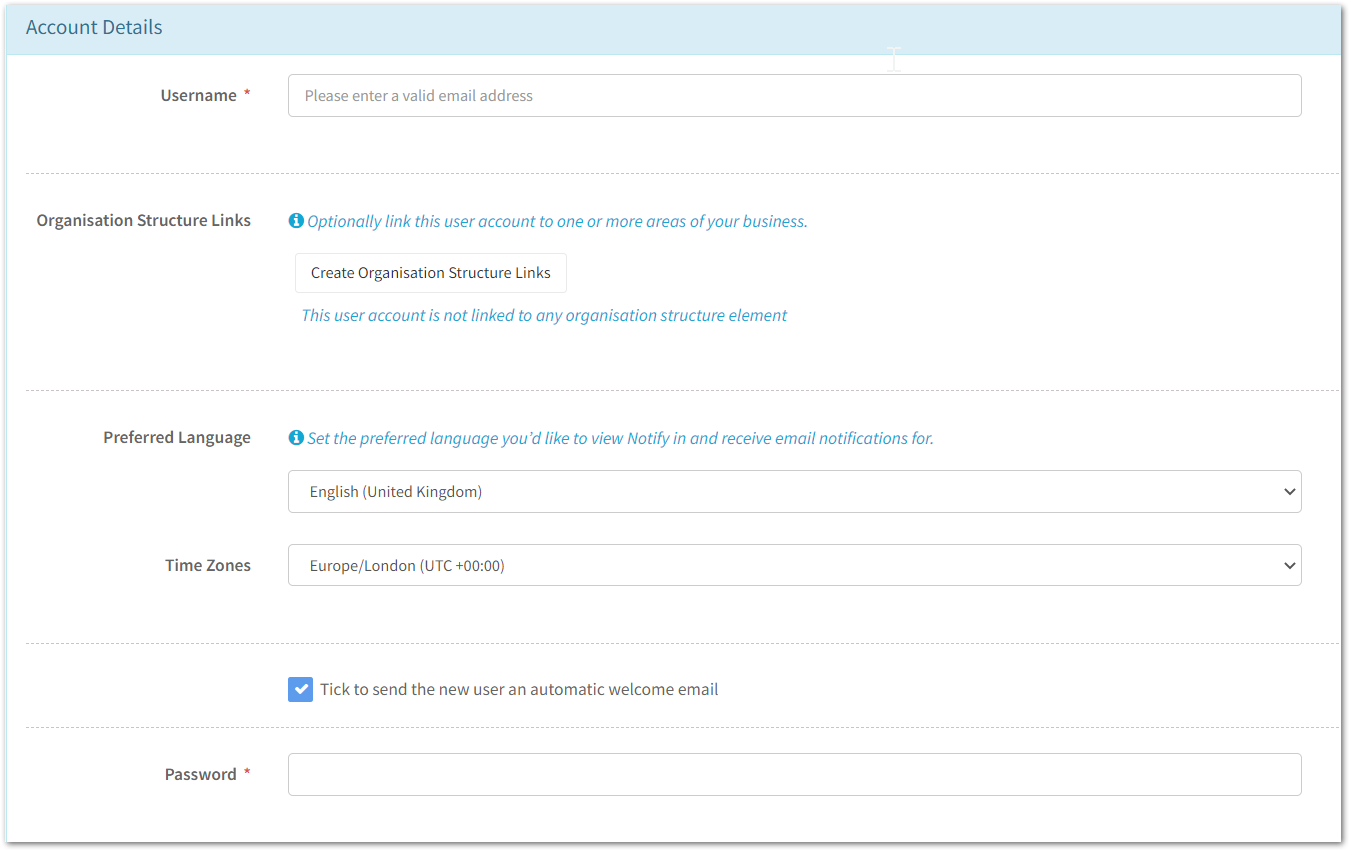
3. Enter/Update the account details

Here, you will:
- Enter the username
This will be the persons email address. - Optionally set up Organisation Structure links
This will allow you to link the user to areas of the business so they're able to view incidents, actions, audits, risk assessments and method statements for their business areas.
For example, you may wish to do this for Regional Managers.
To do this Click the Create Organisation Structure Links, then select the locations you would like them to access and click save.
Note: To restrict to certain areas of the business, you will also need to apply Departmental permissions, this is done later on in User Group Permissions.
- Select the users preferred language
To learn more about adding additional languages, click here. The user will be able to configure this at a later date. - Create a password
The password must be over 12 characters and include the below:
- At least 1 upper case letter
- At least 1 number
- At least 1 special character ( ! ; @ ; ? )
4. Switch on the relevant modules

Here you will also see how many licences are in use and how many are remaining.
5. Optionally switch on email notifications

Note: These settings can also be configured by the user at a later date from their user profile.
6. Enter the contact details

Only the first and last name are mandatory fields.
7. Click save once all mandatory fields are complete

Once you have saved the profile, you will be redirected to the permissions page, this is where you will determine the level of data the new user will be able to access on the system.
In order for a user to successfully use their account, they will need permissions set.
Click here to read about setting user permissions.
![Notify_Refresh_MasterLogo_CMYK[1]](https://helpcentre.notifytechnology.com/hs-fs/hubfs/Notify_Refresh_MasterLogo_CMYK%5B1%5D.png?width=291&height=117&name=Notify_Refresh_MasterLogo_CMYK%5B1%5D.png)