How do I use form fields in audit templates?
This article provides a guide in adding form fields in your audit form templates as well as detailing what you are able to do with these.
Firstly, you will need to login to your Notify account, you can do this here
1. Click on the Form Templates tab

2. Click on Create new template

If you are editing an existing template, click on the template rather than creating a new one.
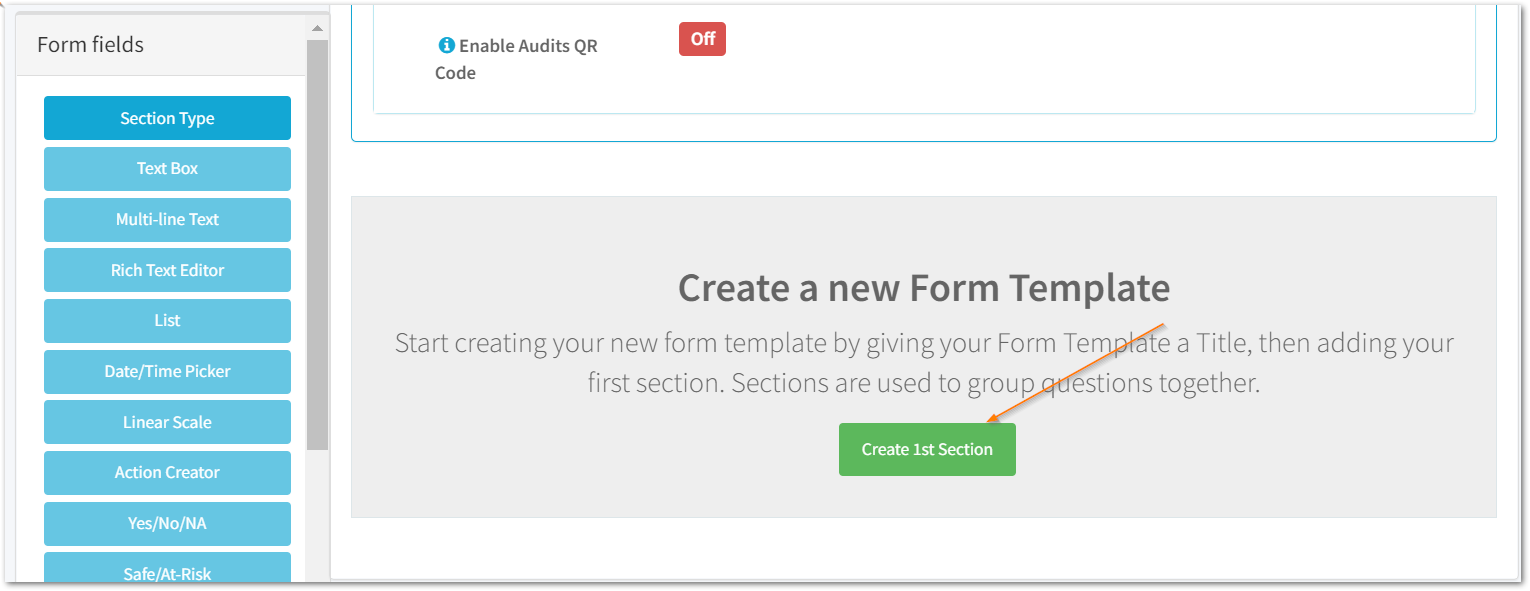
3. Select Create 1st Section in the Form Fields menu

Alternatively, click on Section Type to add a new section and any following additional sections.
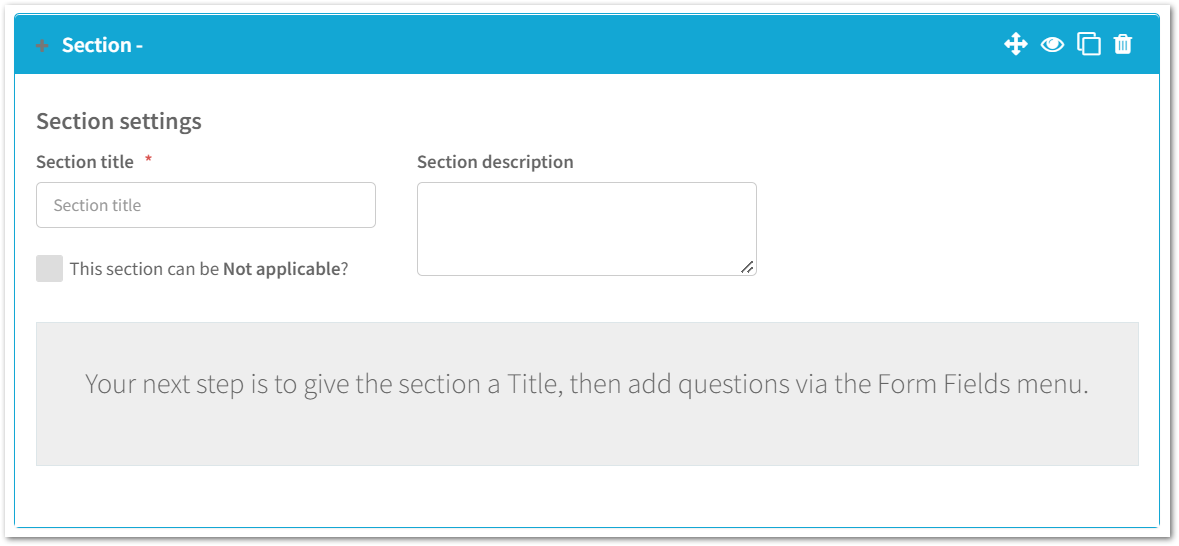
4. Add the section details

Here, add a title for your section, for example 'Audit details'.
You can also include a section description, as well as allowing the section to be marked as Not Applicable when the audit is being carried out.
5. Click on the field type(s) that you would like to include in your audit template

As you add in the fields, you will notice that you're able to customise how these will appear in your audit - an overview on these is provided below:
- Required
Any fields you mark as required will block the auditor from completing the audit if these are not answered. - Header Field
Any answers to questions with 'header field' checked will appear in the Audit Title in the Audits tab. - Remember last answer
Any fields that have this checked will remember what the auditor entered the last time they carried out the audit. - Placeholder
Including placeholders will allow you to provide an example answer or guidance for auditors. - Hide not applicable option
Removing this option will hide the ability to mark questions as not applicable. - Include in Summary Report
Check this box to include the field in a Summary Report when exporting the audit to PDF. Click here to read more about exporting audits to PDF.
The following part of the article will provide an overview of each form field type - alternatively, click on each item below to read more:
1. Section Type
2. Text Box
5. List
7. Linear Scale
10. Safe / At-Risk
11. Picture
12. Global List
13. Location
15. Embedded Picture
16. Confirmation
17. Guidance Text
18. E-Signature
Tip: As you build your template you can preview how this will appear by clicking on the Preview button on the bottom left of the page.
- Section Type
When you want to add a new section in your audit, click on this. You are then able to include the other form fields within the sections you create. - Text Box
 Use this for collecting small amounts of information e.g. Auditor's name
 - Multi-line Text
 This field can be used as a way to capture notes; comment boxes, and/or allow auditors to enter larger amounts of text.
 - Rich Text Editor
 This field is the same as the Multi-line text box but it provides auditors with the ability to format text and include hyperlinks when used on the web.
This field is not yet supported on our AI app and will default to a Multi-line text box. - List
 Use this field to create single or multiple selection checklists.
Select Add Option to create items on your list; to allow users to select multiple options you will need to check 'Allow the user to select multiple options'. - Date/Time Picker

This field can be used to allow auditors to enter dates and/or times when completing an audit, e.g. contract start/end date - Linear Scale
 Use this field to allow auditors to select on a linear scale, e.g. rating quality.
 - Action Creator
 Including this field will allow auditors to create and assign actions whilst conducting an audit.
 - Yes / No / N/A
 Use this field to add questions requiring a yes, no or not applicable response. To remove the n/a option, select Hide not applicable option.
 - Safe / At-Risk
 This field will allow auditors to mark an item as Safe, At Risk or Not Applicable
 - Picture
 Using this field will allow auditors to take and upload pictures whilst conducting their audit
 - Global List
 This field will allow you to select from existing lists created in the Global Lists tab - when an audit is being carried out, the auditor will be able to select an item from the list. e.g. Standards and Clauses.
- Location

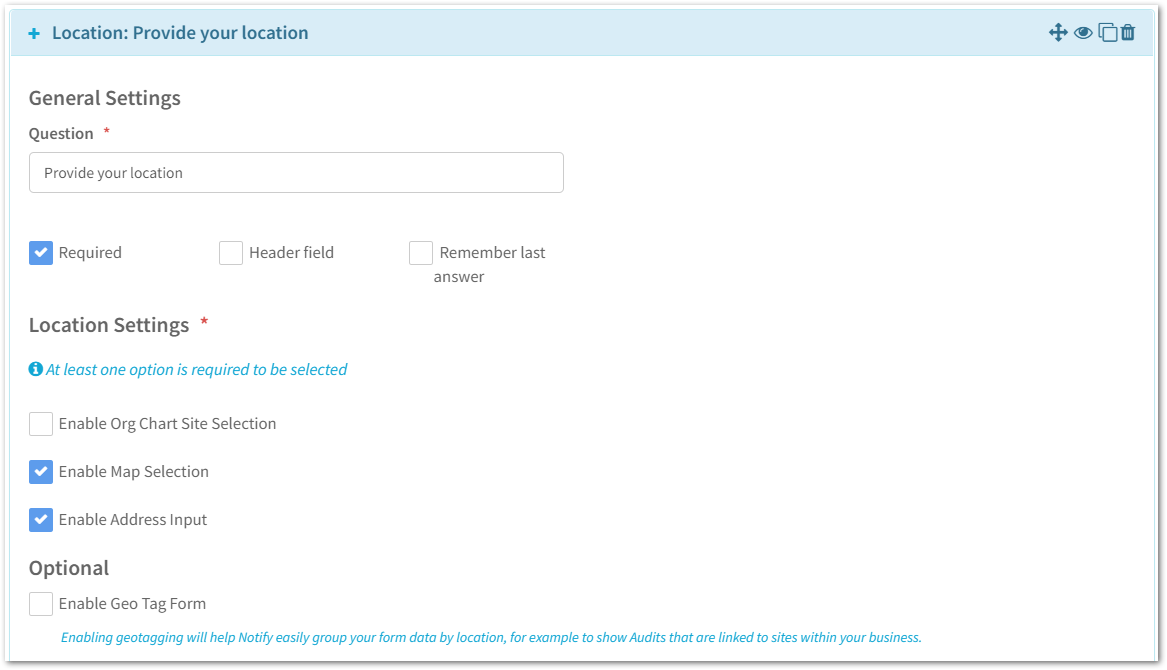
Using the location field will allow auditors to enter their location in regard to their organisation structure; map location or address.If you would like to collect the auditors' organisation structure location and their map/address location, we recommend including two or more Location fields.
For collecting the Organisation Structure location, ensure the below boxes are checked:
- Required
- Enable Org Chart Site Selection
- Enable Geo Tag Form
 This will also allow you to filter your audits by Organisation Structure location on your Audits page and Extended Dashboards.
 For collecting the map and/or address location:
- Enable Map Selection
- Enable Address Input

- Red / Amber / Green
 This field will allow auditors to rate a statement or question on a red, amber or green scale. The button's will default to RAG, however these can be overridden in the text boxes shown above.
 - Embedded Picture
 Use this field to embed pictures into the audit template, e.g. Images in a DSE assessment to show what 'ideal' looks like.
 - Confirmation
 Using this field will include a small check box for auditors to mark. e.g. Check this box to confirm you have observed the above image.
 - Guidance Text
 This field will allow you to provide guidance to the auditors on how to answer questions, the level of detail required, reminders on what they need to observe etc.,
 - E-Signature

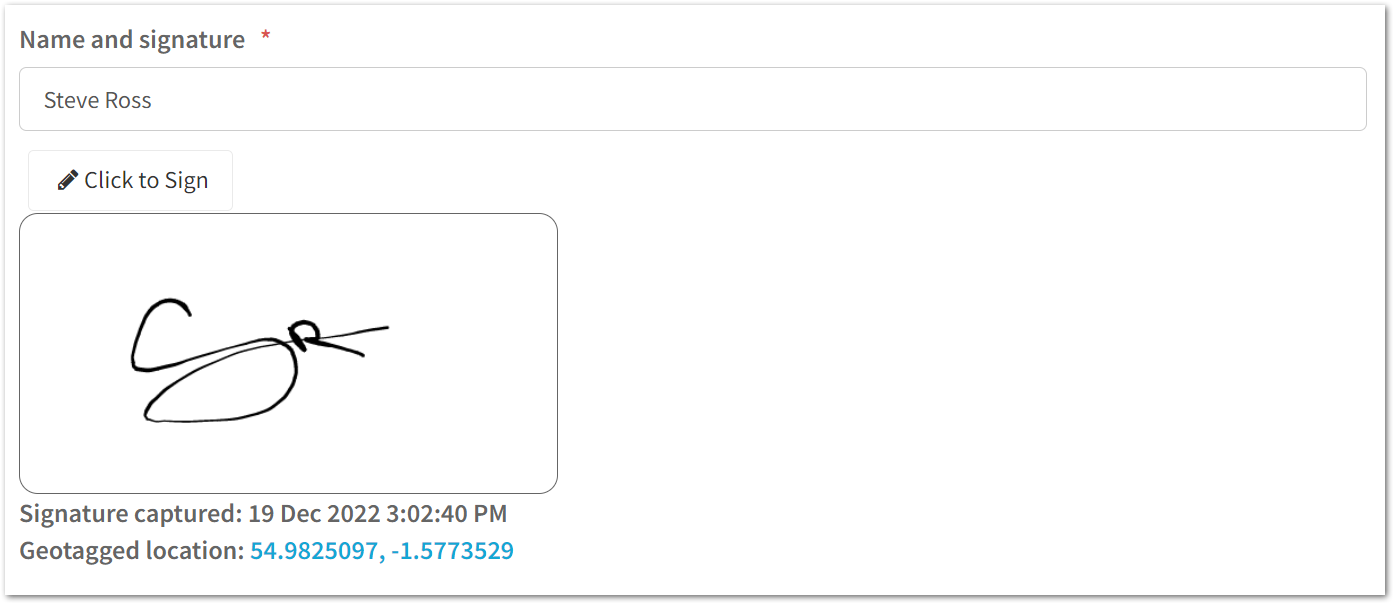
With this field, you have the ability to geo-tag the location (location services must be enabled on devices to collect this), as well as capturing the date and time the signature was collected.
![Notify_Refresh_MasterLogo_CMYK[1]](https://helpcentre.notifytechnology.com/hs-fs/hubfs/Notify_Refresh_MasterLogo_CMYK%5B1%5D.png?width=291&height=117&name=Notify_Refresh_MasterLogo_CMYK%5B1%5D.png)